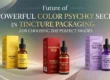
How to Create a Tincture Packaging Prototype
Packaging plays a big role in how a tincture product looks and feels. Before final packaging goes into mass production, a tincture packaging prototype helps test the design, material, and fit. A prototype shows how the final product will appear and helps fix problems early.
This guide explains how to create a tincture packaging prototype step by step. Every section covers an easy and practical way to make a design ready for production.
Understanding What a Tincture Packaging Prototype Is
A tincture custom packaging prototype is a sample box or container made to check design, size, and quality before final printing. It acts as a visual model that helps brands see how their packaging will look in real life. A prototype allows changes in materials, box printing finishes, and structure without wasting money on large-scale production.
Main Purpose of a Prototype
- To test the size and shape of the tincture box.
- To see how the labels and colors appear when printed.
- To check the fit of the tincture bottle inside the box.
- To confirm that the packaging gives a premium unboxing experience.
A good prototype saves both time and money by reducing errors before mass production.
Importance of Creating a Prototype
Creating a tincture packaging prototype brings many benefits to a brand. It helps in testing design ideas, avoiding costly mistakes, and improving product presentation.
Ensures Perfect Fit and Size
The tincture bottle should fit perfectly inside the packaging. A prototype checks this before printing hundreds of boxes.
Improves Design Accuracy
Colors and fonts on a computer screen may look different when printed. A physical prototype shows how real packaging will appear.
Boosts Brand Image
A well-designed prototype helps choose the right finish, coating, and material. The final packaging then looks elegant and professional, building trust with customers.
Saves Money
Without a prototype, wrong dimensions or dull printing may cause loss. A prototype helps catch mistakes before final printing, saving both material and printing costs.
Key Elements of a Tincture Packaging Prototype
Creating a good tincture box prototype needs attention to a few main parts. Each element adds value to the final product.
Structure and Dimensions
The structure defines the shape and folding style of the tincture box. The dimensions must match the size of the bottle. Too tight or too loose packaging can harm the product during shipping.
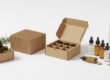
Material Choice
The type of paperboard or kraft material affects the box strength and feel. For tinctures, sturdy cardboard or eco-friendly kraft paper works best. It keeps the bottle safe and gives a natural look.
Printing Design
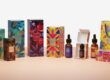
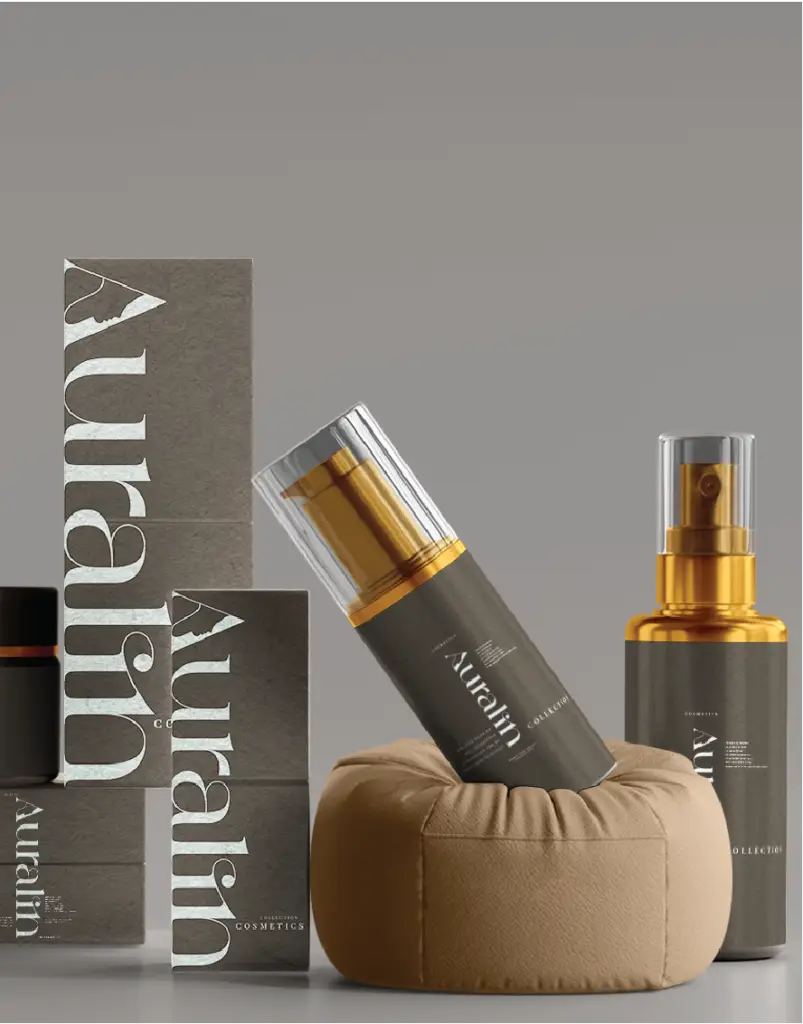
The design includes the logo, brand name, color theme, and label details. This visual part makes the box stand out on the shelf.
Finishing Options
Finishing options like matte lamination, gloss coating, embossing, or foil stamping add beauty. Testing these finishes on a prototype helps pick what looks best.
Insert and Inner Fittings
An inner insert holds the bottle firmly inside the box. It prevents damage during movement or delivery.
Step-by-Step Process to Create a Tincture Packaging Prototype
A well-planned process makes prototype creation easy and effective. Below are the main steps followed by packaging designers.
Step 1: Research the Product and Brand Style
Before design starts, study the tincture product. The packaging should match the brand identity, target audience, and product type.
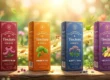
For example, organic tinctures often use kraft paper packaging to highlight natural appeal, while luxury tinctures use rigid boxes or foil stamping for a premium look.
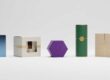
Step 2: Choose the Packaging Type
- Different tincture box styles serve different purposes. Common box styles include:
Tuck-End Boxes: Easy to assemble and suitable for retail display. - Drawer Boxes: Offer premium unboxing experience.
- Mailer Boxes: Strong and protective for shipping.
- Rigid Boxes: Used for luxury tincture products.
- The right style depends on where and how the product will be sold.
Step 3: Measure the Bottle Dimensions
Accurate measurement is very important. A box that is too large looks unprofessional, while one that is too tight may break the bottle.
Measure the height, width, and depth of the tincture bottle. Then add a small margin for ease of packaging.
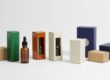
Step 4: Select the Material
Material choice affects both look and strength. Some popular materials for tincture packaging prototypes include:
Cardboard: Lightweight and easy to print on.
Kraft Paper: Eco-friendly and durable.
Corrugated Board: Provides extra protection during shipping.
Rigid Board: Thick and perfect for luxury packaging.
Step 5: Design the Artwork
Designing the artwork is one of the most creative steps. The design includes the logo, brand name, product details, and graphics.
Use soft, natural colors for herbal tinctures and bold metallic tones for luxury tinctures. The design should also follow FDA labeling rules if used for medical or herbal products.
Step 6: Choose Printing Technique
Different printing methods give different looks. Popular techniques for tincture packaging include:
Digital Printing: Great for small runs and sample prototypes.
Offset Printing: Provides high-quality color results for large runs.
UV Printing: Adds a glossy finish and protects the print.
Screen Printing: Used for bold and durable designs.
Testing a printing method in the prototype helps find the perfect match.
Step 7: Add Finishing Touches
Finishing gives the box a complete and premium look. The prototype should test different finishes such as:
Matte or Gloss Lamination: Changes texture and shine.
Embossing and Debossing: Creates raised or pressed logo effects.
Foil Stamping: Adds metallic colors like gold or silver.
Spot UV: Highlights certain design areas for shine and focus.
Step 8: Assemble the Prototype
After printing and cutting, the prototype is assembled. Folding, gluing, and inserting the bottle are done carefully to check the strength and appearance of the final box.
Step 9: Test the Prototype
Testing ensures that the box protects the tincture bottle and looks attractive. The following checks help confirm quality:
Drop Test: Ensures protection during shipping.
Color Match Test: Confirms that colors print as expected.
Fit Test: Checks if the bottle fits securely.
Visual Test: Ensures design alignment and clean edges.
Step 10: Make Improvements
After testing, changes may be needed. Adjusting dimensions, improving artwork contrast, or changing paper thickness are common updates. Once all looks perfect, the packaging moves to full production.
Common Mistakes to Avoid During Prototype Creation
Even small errors can affect packaging quality. Avoiding these mistakes helps create a better final product.
Ignoring Bottle Size Accuracy
Wrong dimensions can lead to loose or tight packaging. Always use accurate measurements.
Using Low-Quality Paper
Thin or weak paper may tear easily. Always test strong material for long-lasting performance.
Skipping Print Testing
Colors may appear dull or off without proper print testing. Always test printing before final approval.
Overcrowded Design
Too many colors or graphics can confuse the buyer. A clean, minimal design looks more professional.
Tools and Software for Packaging Prototypes
Several design tools help create mockups and dielines for tincture packaging prototypes. Some popular options include:
Adobe Illustrator: Used for creating dielines and vector artwork.
ArtiosCAD: Helps build 3D structural packaging models.
Esko Studio: Used for realistic 3D packaging visualization.
Canva or Figma: Great for simple and easy design layouts.
These tools help create digital and physical samples for testing.
Sustainable Options for Tincture Packaging Prototypes
Eco-friendly packaging is becoming popular in tincture products. A prototype can test different sustainable materials before final printing.
Recyclable Paperboard
Made from recycled fibers, it is lightweight and reduces waste.
Kraft Paper
Brown kraft boxes give a natural and earthy feel, perfect for organic tinctures.
Soy-Based Inks
These inks are biodegradable and safe for the environment.
Water-Based Coatings
Instead of plastic laminations, water-based coatings keep packaging eco-safe.
Testing these options during the prototype phase helps meet sustainability goals.
Role of Mockups and 3D Models
Before printing a physical prototype, digital mockup is helpful. These show how the box will look from all angles.
A 3D model helps visualize design, texture, and bottle placement without using real materials. It also saves cost and speeds up the approval process.
9. Cost Factors in Prototype Creation
The cost of a tincture packaging prototype depends on:
Material type (kraft, rigid, or cardboard).
Printing technique (digital or offset).
Design complexity (simple or detailed).
Finishing options (foil, emboss, or lamination).
Creating one prototype usually costs more per unit but prevents major loss later in bulk production.
Testing Market Response with a Prototype
Before mass printing, prototypes can be shown to customers or retailers. Their feedback helps improve packaging design. A good-looking prototype can also be used in product photography and marketing presentations.
Final Approval and Production
Once the prototype passes all checks, the design is ready for mass production. The same specifications used in the prototype guide the full printing run. This ensures that every tincture box looks consistent and professional.
Benefits of a Well-Made Tincture Packaging Prototype
A strong prototype builds a strong brand image. Some benefits include:
Accurate and cost-efficient packaging.
Better product protection during shipping.
Improved design testing before production.
Stronger brand trust through premium appearance.
Reduced waste and faster approval times.
Conclusion
A tincture packaging prototype is a smart step before large-scale production. It allows testing design, strength, and fit without wasting resources. By following a clear process — from research to testing — packaging becomes more effective, attractive, and eco-friendly.
Creating a prototype not only saves cost but also helps the tincture product stand out in a competitive market. Every small detail in the prototype leads to perfect packaging that speaks of quality and care.
FAQ Section
Q1: What is the main purpose of a tincture packaging prototype?
The prototype helps test the box design, fit, and quality before mass production.
Q2: Which material works best for tincture packaging prototypes?
Cardboard, kraft paper, and rigid board are popular for strength and printing quality.
Q3: How can the prototype improve branding?
A prototype helps select perfect finishes, colors, and designs that match brand identity.
Q4: Is a prototype necessary before full production?
Yes, it prevents mistakes, saves money, and ensures the final box meets expectations.
Q5: Can eco-friendly materials be used for tincture packaging prototypes?
Yes, recyclable and biodegradable materials like kraft paper and soy-based inks work well.