How to Design Mailer Boxes for E-Commerce Brands
Your box is your first real-life handshake with the customer if you’re online. They can’t set foot in your store. They can’t touch your racks. So your mailer box is your store. This is why clever e-commerce businesses use custom mailer boxes. A good box can possess the power to grab attention, guard your products, and establish your brand.
In this article, we’ll explain step by step how to design mailer boxes for your online business. This guide is written in very easy English. Even a 6th-grade student can understand it. It is also SEO-friendly, with low-competition, high-volume keywords. Let’s begin.
What Is a Mailer Box?
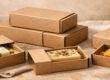
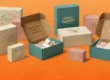
Mailer’s box is a sturdy cardboard box with fold-in flaps. It is widely used for shipping products. Mailer boxes are simple to open and close. They protect items when they are being shipped. Most small online businesses utilize mailers to send apparel, cosmetics, books, or small devices.
Why Mailer Boxes Are Important in Online Business
With e-commerce, your box is no longer packaging. Your box is a part of your brand. When your customer opens the box, it should make him smile. A good mailer box:
- Protects the product
- Represents your brand style
- Win your customer’s trust.
- Triggers repeat sales
- It’s great for unboxing videos.
Unboxing videos are trending on YouTube and Instagram. If your box is cool, then people will share it. This is free publicity for you.
Step 1: Familiarize Yourself with Your Product Size and Weight
Before you make your own custom mailer box, you must first be familiar with your product.
Ask yourself a few easy questions:
What is the size of my product?
Take the length, width, and height of your product. Measure it with a ruler or a measuring tape.
How much does it weigh?
Weigh your product on a tiny scale. This will help you select the proper box material.
Is it soft or delicate?
If your item is delicate (such as glass, candles, or electronics), you will need a sturdy box and additional cushioning. If it’s soft (such as clothes or towels), a less dense box will probably suffice.
Understanding these helps you select the right size and strength of mailer box. If your box is too large, your product will shift. It can be damaged when it’s shipped. If your box is too small, your product may not fit, or it can be crushed.
Pro Tip: Always include 1 to 2 inches of extra space around your product. This is for inserts, padding, or bubble wrap. It protects your item inside the box.
Also, don’t forget that shipping costs will vary depending on the box weight and size. Shipping will cost more if your box is oversized or overweight. The right size saves you money.
Example:
If you are selling handmade soap, measure the size of the soap bar. Make space for tissue paper and possibly a thank-you note.
Now you know the ideal box size to use.
Step 2: Choose the Right Mailer Box Style
There are various types of custom mailer boxes. Choosing the correct type is very crucial. Your selection should complement your product as well as provide a pleasant unboxing experience.
Let’s discuss the most popular mailer box types:
- Standard Mailer Box
- It’s the most widely used box in e-commerce.
- It consists of two side flaps and a front flap, which folds into the box.
- It is simple to open and close.
- It is suitable for most products like clothing, books, and gifts.
Best used by:
Small businesses, fashion labels, bookstores, and generic web stores.
Why use it?
It is clean-looking, long-lasting, and well-suited to branding. You can imprint your logo at the top and also have inside imprinting.
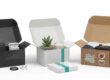
- Front-Lock Mailer Box
This type of box has a locking tab on the front flap.
- The front slides neatly into the box.
- It appears neat and trendy.
- It has added protection and a high-end appearance.
Recommended for:
Tech gadgets, skincare, jewelry, or whatever provides that high-end feel.
Why use it?
It provides your purchaser with a sense of quality. It is ideal for luxury or subscription boxes.
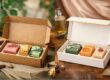
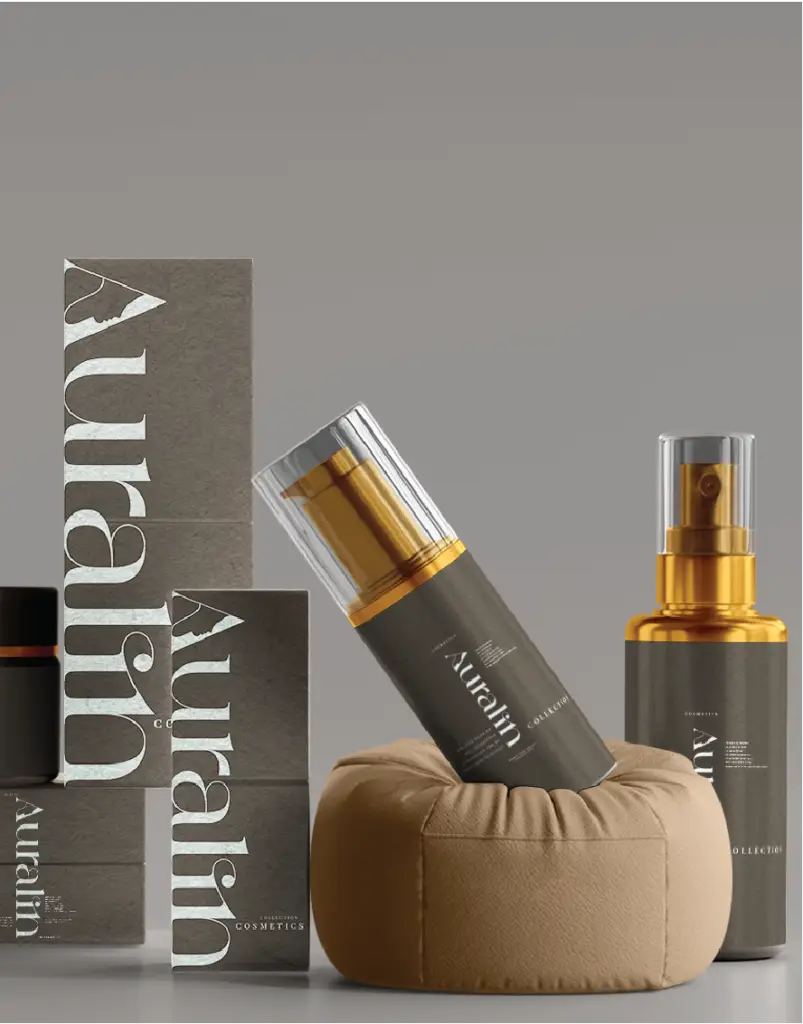
- Display-Style Mailer Box
- It opens similarly to a gift box or tray.
- The top opens up.
- Your product is presented like a display.
- Easy to reuse and store.
Ideal for:
Retail products, makeup, candles, or advertising materials.
Why use it?
It is an excellent unboxing experience and makes your product look very special. People prefer to store this box for reuse.
- Roll End Tuck Top (RETT) Mailer Box (optional bonus design)
- This is a double-sided wall box with a front tuck.
- Very secure and strong.
- Generally used for fragile or heavy products.
Best used for:
Electronics, delicate gifts, or far-away shipped products.
Why use it?
It provides good protection and a good fit.
How to Pick the Perfect Mailer Box Design
Ask yourself:
What’s the vibe I’d like my customer to experience when they open this box?
(Fun? Fancy? Natural? Premium?)
How protective is my product?
(Is it fragile or lightweight?)
Will my customer share their unboxing?
(Pick something that photographs beautifully!)
If unsure, begin with the standard mailer box. It is versatile enough for most products and easy to design.
Fast Tip:
You also have the option to include custom packaging printing on any type of mailer box. Your design should be adaptable to the box type. The top, flaps, and sides must be large enough for your brand message, logo, and colors.
Step 3: Select the Correct Material
- Most mailer boxes are made of corrugated cardboard.
- The material is strong and safeguards your product.
- There are numerous types of corrugated board:
- E-flute thin and narrow – Suits light products and printing.
- B-flute thicker – Ideal for tougher protection
- Double-wall – Ideal for heavier or delicate items
Select the flute depending on how much protection your product requires.
Step 4: Select Your Print Style
You can now add your logo, colors, and text. You have two primary printing styles:
- Digital Printing
Ideal for short runs (small orders). Provides sharp and colored prints.
- Flexographic Printing
Good for many runs (bulk orders). Less expensive for many boxes but not as advanced.
Consider your budget. You are still new, so digital is the right way.
Step 5: Create a Simple and Bold Mailer Box
Your mailer box must have a clean yet bold design. You can utilize:
- One or two colors (don’t be too extravagant)
- Your company logo (clear and large enough)
- A short tagline or message (such as “Thanks for your order!”)
Don’t use too much text or too many pics. Customers prefer plain, easy-to-read designs.
Best practice: Utilize your brand colors. If your brand is laid-back, use muted colors. If it’s playful, use bright colors.
Step 6: Add Inner Printing (Optional but Far Out)
Easter egg your customer when they open the box. You can print on the inside as well. Add:
- A thank-you message
- Instructions
- A promo code for the next purchase
- A silly message like “You’ve got great taste!”
- This little touch makes your packaging stand out.
Step 7: Add Inserts or Dividers
Inserts are little bits of cardboard or foam that keep your product stable. They:
- Keep products from shifting around.
- Make the box look neat.
- Improve the unboxing experience.
- Custom inserts are particularly handy for skincare, candles, jewelry, and tech products.
Step 8: Opt for Eco-Friendly Alternatives
Increasingly, consumers of today are interested in the environment.
They seek out green packaging. Do this:
- Use recycled cardboard
- Do not use bubble wrap or plastic tape.
- Print in soy or water-based ink.
- Put a stamp that says “Eco-friendly” on the box.
- Eco-friendly packaging earns trust. It indicates you care about more than money.
Step 9: Add Branding Elements
Make your mailer box a part of your brand narrative. Use:
- Custom stickers
- Stamps
- Washi tape with your logo marked
- Each small touch contributes to your brand identity. Clients do recall the small stuff.
Step 10: Test Before You Order in Bulk
Always test your design prior to ordering 500 or 1,000 boxes. Request a sample from the supplier. Check:
- Box strength
- Print quality
- Colors
- Fit of the product inside
- This step prevents expensive errors. You can fix any issues prior to investing more cash.
Step 11: Work With a Reliable Packaging Supplier
Don’t go for the lowest price provider. Select one that:
- Provides free samples
- Assists with box design
- Provides transparent prices
- Works with good quality materials
- Has a good reputation
Ask questions such as:
- Do you provide small order sizes?
- Can you assist with the insert design?
- Speed of delivery?
- Good communication prevents issues later.
Step 12: Make It Instagram-Worthy
Lots of customers enjoy sharing their unboxing online. Make sure your box looks good in photos. Try:
- A strong front design
- Vibrant inner colors
- Clean creases and no tape to be found
- A tiny surprise, such as a gift card or sticker
- This is how you build on social media without breaking out the ad budget.
Step 13: Update Your Design As You Expand
Your brand will evolve. So should your box. Periodically, every couple of quarters, ask:
- Is my packaging still aligned with my brand?
- Are there new trends I can trend-set to?
- Can I update the materials or style?
New designs indicate that you are concerned about customers and current with your brand.
Common Mistakes to Steer Clear Of
These are some of the mistakes to avoid:
- The box is either too small or too big for the product.
- Poor print quality (blurred or washed-out logos)
- Over-designing with too many colors
- Weak cardboard that can bend or break
- Forgetfulness of green options.
- Steer clear of these, and your box will create an excellent first impression.
Final Thoughts
Creating the ideal mailer box for your online store isn’t difficult. Begin with product size. Select material that is tough. Include your logo and your colors. Keep it minimalist and simple. Go green. Provide your customer with a pleasant unboxing experience.
Packaging that works is dependable. It makes individuals remember you. And they return and purchase again.
Your mailer box is more than a box. It’s your brand in one’s hands.
FAQs
Q 1: What is a mailer box?
A sturdy cardboard box with fold-in flaps for shipping products.
Q 2: Why are mailer boxes important for e-commerce?
They protect products, enhance branding, and improve unboxing.
Q 3: Which material is best for mailer boxes?
Corrugated cardboard, with E-flute or B-flute depending on protection needs.
Q 4: How can I make my mailer box eco-friendly?
Use recycled cardboard and soy-based or water-based inks.
Q 5: What makes a mailer box Instagram-worthy?
Bold design, neat finish, and small surprises inside.