The Lifecycle of Custom Packaging: From Concept to Customer’s Hands
Packaging is no longer an afterthought these days—it’s a brand experience. Branded packaging is essential for building brand identity, ensuring product safety, delighting customers, and even going viral. But what are the elements of that perfect branded box or bag?
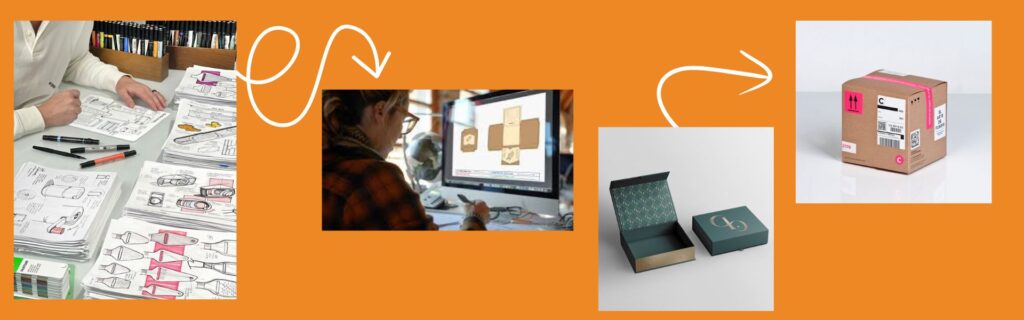
This ultimate guide dissects the entire bespoke packaging process step by step, from that initial spark of inspirational energy to the moment when a customer opens their package.
You might be a start-up business sending out your very first product or an existing brand ready to grow. Being aware of this process enables you to make more informed decisions, sidestep expensive blunders, and provide packaging that’s both functional and memorable.
Stage 1: Ideation & Concept Development
Every successful packaging solution starts with a strategic concept. In this stage, companies work together with designers or package experts to answer essential foundation questions:
- What is the product?
- Who is the customer?
- What emotion needs to be evoked through the packaging?
- What needs to be said about the brand?
Deliverables in this stage:
- Brand guidelines and mood boards
- Packaging form decisions (box, pouch, sleeve, tube, etc.)
- Sustainability targets (recycle-friendly, compostable, low-waste)
- Budget balance
This is the DNA of your packaging. It’s where strategy and function meet with look.
Stage 2: Structural Design & Materials Choice
With guidance in place, it’s time to get sleeves rolled up. Structural design is all about how the packaging performs at a physical level—how it fits the product exactly and gets on with its essential jobs of protection, show, and transport.
The following are all considered:
- Product size and weight
- Fragility or special care
- Shelf display versus shipping limitations
- Material type of the package material (paperboard, corrugate, rigid box, kraft, plastics, bio-based materials)
Material engineers and scientists can model the structure using 3D computer-aided design software (such as ArtiosCAD or SolidWorks) and simulate virtual stress.
Green packaging trick: Use FSC-certified paperboard or post-consumer recyclate material to make eco-friendly consumers proud.
Stage 3: Graphic Design & Branding
This is where visual storytelling is involved. Your goal is to develop graphics that are an extension of your brand identity but also blend into the structural design without a hitch.
Things that get pinned down:
- Logo size and position
- Type and hierarchy
- Color scheme
- Finishes and effects (matte/gloss lamination, foil stamping, embossing, spot UV)
- QR codes, social handles, product information, or legal labeling
Designers have art prepared to print with proper dielines, bleed, and CMYK/Pantone color calls.
Your package may be your first impression. Get it firm, clear, and consistent.
Stage 4: Prototyping and Sampling
A physical prototype (or set of samples) is constructed before mass production. This is to test confirmation of the design, material, size, and general user interaction.
Types of prototypes:
- White mockups: No print—used to test structures.
- Printed samples: Branded up ones to test colors, finishes, and copy.
- Functional mockups: With actual product for trial shipping or shelf position testing.
This is the time to find any packaging pain points:
- Does it open well?
- Does it appear high-end?
- Does it protect the product against drops or shipping?
Prototypes can be demonstrated to stakeholders or for soft launch feedback.
Stage 5: Testing and Compliance
Depending on your product category and industry, packaging might require some performance, safety, or regulatory testing before selling in the market.
Some typical tests are:
- Drop and compression testing (ISTA standards)
- Temperature/humidity testing (for perishable items)
- Tamper-evidence or child-resistant certification
- Request for compliance with labels (FDA, CE, etc.)
- Recyclability and biodegradability testing
For shipping internationally, the destination country’s packaging law and environmental regulations need to be adhered to.
Stage 6: Production & Manufacturing
When your design files, prototypes, and samples have been completed and approved, your packaging enters the manufacturing stage, where art and technology are integrated. Accuracy, coordination, and quality control must be maintained at this point since even a slight mistake may influence the visual appearance, shape, or functionality of your packaging.
The following is a step-by-step breakdown of each:
1. Printing – Bringing Your Design to Life
Printing is where your brand’s graphic identity gets duplicated onto the chosen material.
Two types of printing are utilized:
Offset printing (lithography):
Suitable for high quantities. Offers high color fidelity, high detail, and the ability to utilize Pantone spot colors. Expensive to set up, but the cost per unit decreases with quantity.
Digital printing
More appropriate for short production runs, specialty runs, or prototyping. Does not involve the use of printing plates, hence enabling quicker turnaround and greater freedom of design regarding choices (e.g., specialty packaging).
Most important printing considerations:
- Type of ink (soy-based, UV, water-based)
- Level of finish (matte, gloss, satin)
- Material compatibility (kraft, corrugated, SBS paperboard)
Visual clarity and color consistency are of the highest priority here. Accurate color proofing guarantees the finished printed product will be exactly as the designer envisioned.
2. Creasing & Cutting – Shaping the Structure
The printed packaging material is finally creased and cut to exact detail with custom metal dies or laser cutting.
- Die-cutting: Your packaging’s dieline (its 2D layout) is used to create a steel die. The die presses out the form of the bag or box to exact accuracy.
- Creasing/Scoring: Lines are pressed into the material (without cutting) to bend more easily into its final form later. Proper creasing avoids cracking on folds, particularly for stiff or coated materials.
By completing this step, your packaging not only looks great on the outside but folds up and shapes nicely as well.
3. Folding & Gluing – Assembling the Packaging
After scoring and cutting the sheets, the other step is to shape the flat pieces into 3D shapes:
- Folding machines bend the packaging over creased folds.
- Glueing machines (cold-glue or hot-melt adhesive) join panels together—primarily for cartons, sleeves, pillow boxes, or store boxes.
There is tucking, tabbing, or magnetic closing as well, which is assembled manually in case it cannot be automated.
Care should be taken during this process so that all boxes are closed, aligned, and in proper shape.
4. Special Finishes – Adding Visual & Tactile Appeal
Special finishes are employed to provide a premium or an alternative appearance to your packaging after printing and building to enable it to possess a premium or a unique feel.
Standard finishing procedures are:
- Foil Stamping: Gold, silver, rose gold, and other metallic foils applied to emphasize text or logos. Providesa luxury touch.
- Spot UV Coating: Gloss finish on individual spots (e.g., product photo or logo) for visual differentiation.
- Embossing/Debossing: Indented or raised patterns/text that provide a depth and tactile feeling.
- Soft-touch coating: Velvet effect that provides a smooth, luxurious feel.
- Variegated laminates or varnishes: Mimic material textures like stone, leather, or linen.
These coatings serve more than a visual purpose—they affect brand perception, perceived value, and shelf presence.
5. Quality Control – Ensuring Perfection Before Delivery
Quality control (QC) is at every step, but particularly in and after manufacturing, to provide assurance that the final product meets the desired specifications.
What QC teams inspect
- Print quality – Are colors balanced? Is the text legible and distinct?
- Alignment – Are folding, cutting, and glued edges aligned correctly?
- Durability – Does the package function to safeguard the product as intended?
- Finish quality – Is the specialty finish bubble-free, smudge-free, and in the correct position?
- Structural integrity – Is the package shippable or stackable?
- Faults are detected by pulling random samples and checking them during the run. Upon discovery of faults, the line is closed down, fixed, and restarted.
Better QC practices avoid product damage, customer complaints, as well as expensive returns or reprints.
Stage 7: Assembly & Fulfillment
Pre-assembly and fulfillment operations can also be included in influencer packs, curated kits, or subscription boxes, along with the packaging.
They comprise:
- Product placement into boxes
- Tissue paper, filler, or handwritten note placement
- Filling multiple SKUs in a master pack
- Preparation for shipping and labeling
Some third-party logistics providers (3PLs) provide value-added packaging to make the process easier.
Stage 8: Logistics & Distribution
The second is shipping packing from the factory to your warehouse or to end users directly. Freight management, import/export documentation, and warehousing, if required, are included.
Shipping considerations:
- Size and volume (impacts palletization and shipping cost)
- Warehousing strategy (third-party or internal)
- Demand planning to prevent overproduction
- Inventory management and reorder points
Sophisticated stock control keeps you never short of packaging in busy periods—especially for e-commerce companies.
Stage 9: The Customer Experience
And then, finally, the moment of truth: your parcel in the customer’s hands.
Here, your efforts are worth:
- First impressions – Surprise or delight?
- Unboxing moments – Post it on Instagram or TikTok?
- Brand connection – Make your brand stronger?
- Retention & loyalty – Is it repeatable?
Good packaging gets people to feel. It says, “We care about you.” When that happens, customers return—and bring a friend.
Stage 10: Feedback & Optimization
After your product is out, gather data and feedback to refine your packaging over time.
How to get insights:
- Social media posts and user-generated content
- Surveyss and customer reviews feedback
- damage/return rates (if damaged on delivery, packaging can be optimized)
- A/B testing different designs or inserts
Continuous improvement keeps your packaging fresh, functional, and cutting-edge.
Conclusion
Custom packaging is not just a bag or box—it’s a brand-building tool. Each phase of its life cycle, from design through delivery, is dedicated to crafting the customer experience.
With control of the whole process, you have greater control over price, timing, and most significantly, the customer’s emotional response.
So be it that you are launching a new product, expanding your brand to an even larger scale, or re-launching yourself, treat your packaging as the long-term investment that it is.


