![{"type":"elementor","siteurl":"https://packifyme.com/wp-json/","elements":[{"id":"42a43da","elType":"widget","isInner":false,"isLocked":false,"settings":{"image":{"url":"https://packifyme.com/wp-content/uploads/2025/11/7-Step-by-Step-Guide-to-Designing-Custom-Tincture-Boxes-1.jpg","id":103625,"size":"","alt":"Step-by-Step Guide to Designing Custom Tincture Boxes","source":"library"},"image_size":"large","image_custom_dimension":{"width":"","height":""},"caption_source":"none","caption":"","link_to":"none","link":{"url":"","is_external":"","nofollow":"","custom_attributes":""},"open_lightbox":"default","inline_image":"","lazy_load":"","align":"","align_tablet":"","align_mobile":"","width":{"unit":"%","size":"","sizes":[]},"width_tablet":{"unit":"%","size":"","sizes":[]},"width_mobile":{"unit":"%","size":"","sizes":[]},"space":{"unit":"%","size":"","sizes":[]},"space_tablet":{"unit":"%","size":"","sizes":[]},"space_mobile":{"unit":"%","size":"","sizes":[]},"height":{"unit":"px","size":"","sizes":[]},"height_tablet":{"unit":"px","size":"","sizes":[]},"height_mobile":{"unit":"px","size":"","sizes":[]},"object-fit":"","object-fit_tablet":"","object-fit_mobile":"","object-position":"center center","object-position_tablet":"","object-position_mobile":"","the7_sticky_size":"","the7_sticky_width":{"unit":"%","size":"","sizes":[]},"the7_sticky_width_tablet":{"unit":"%","size":"","sizes":[]},"the7_sticky_width_mobile":{"unit":"%","size":"","sizes":[]},"the7_sticky_space":{"unit":"%","size":"","sizes":[]},"the7_sticky_space_tablet":{"unit":"%","size":"","sizes":[]},"the7_sticky_space_mobile":{"unit":"%","size":"","sizes":[]},"the7_sticky_height":{"unit":"px","size":"","sizes":[]},"the7_sticky_height_tablet":{"unit":"px","size":"","sizes":[]},"the7_sticky_height_mobile":{"unit":"px","size":"","sizes":[]},"opacity":{"unit":"px","size":"","sizes":[]},"the7_sticky_opacity":{"unit":"px","size":"","sizes":[]},"css_filters_css_filter":"","css_filters_blur":{"unit":"px","size":0,"sizes":[]},"css_filters_brightness":{"unit":"px","size":100,"sizes":[]},"css_filters_contrast":{"unit":"px","size":100,"sizes":[]},"css_filters_saturate":{"unit":"px","size":100,"sizes":[]},"css_filters_hue":{"unit":"px","size":0,"sizes":[]},"opacity_hover":{"unit":"px","size":"","sizes":[]},"css_filters_hover_css_filter":"","css_filters_hover_blur":{"unit":"px","size":0,"sizes":[]},"css_filters_hover_brightness":{"unit":"px","size":100,"sizes":[]},"css_filters_hover_contrast":{"unit":"px","size":100,"sizes":[]},"css_filters_hover_saturate":{"unit":"px","size":100,"sizes":[]},"css_filters_hover_hue":{"unit":"px","size":0,"sizes":[]},"background_hover_transition":{"unit":"px","size":"","sizes":[]},"hover_animation":"","image_border_border":"","image_border_width":{"unit":"px","top":"","right":"","bottom":"","left":"","isLinked":true},"image_border_width_tablet":{"unit":"px","top":"","right":"","bottom":"","left":"","isLinked":true},"image_border_width_mobile":{"unit":"px","top":"","right":"","bottom":"","left":"","isLinked":true},"image_border_color":"","image_border_radius":{"unit":"px","top":"","right":"","bottom":"","left":"","isLinked":true},"image_border_radius_tablet":{"unit":"px","top":"","right":"","bottom":"","left":"","isLinked":true},"image_border_radius_mobile":{"unit":"px","top":"","right":"","bottom":"","left":"","isLinked":true},"image_box_shadow_box_shadow_type":"","image_box_shadow_box_shadow":{"horizontal":0,"vertical":0,"blur":10,"spread":0,"color":"rgba(0,0,0,0.5)"},"caption_align":"","caption_align_tablet":"","caption_align_mobile":"","text_color":"","caption_background_color":"","caption_typography_typography":"","caption_typography_font_family":"","caption_typography_font_size":{"unit":"px","size":"","sizes":[]},"caption_typography_font_size_tablet":{"unit":"px","size":"","sizes":[]},"caption_typography_font_size_mobile":{"unit":"px","size":"","sizes":[]},"caption_typography_font_weight":"","caption_typography_text_transform":"","caption_typography_font_style":"","caption_typography_text_decoration":"","caption_typography_line_height":{"unit":"em","size":"","sizes":[]},"caption_typography_line_height_tablet":{"unit":"em","size":"","sizes":[]},"caption_typography_line_height_mobile":{"unit":"em","size":"","sizes":[]},"caption_typography_letter_spacing":{"unit":"px","size":"","sizes":[]},"caption_typography_letter_spacing_tablet":{"unit":"px","size":"","sizes":[]},"caption_typography_letter_spacing_mobile":{"unit":"px","size":"","sizes":[]},"caption_typography_word_spacing":{"unit":"em","size":"","sizes":[]},"caption_typography_word_spacing_tablet":{"unit":"em","size":"","sizes":[]},"caption_typography_word_spacing_mobile":{"unit":"em","size":"","sizes":[]},"caption_text_shadow_text_shadow_type":"","caption_text_shadow_text_shadow":{"horizontal":0,"vertical":0,"blur":10,"color":"rgba(0,0,0,0.3)"},"caption_space":{"unit":"px","size":"","sizes":[]},"caption_space_tablet":{"unit":"px","size":"","sizes":[]},"caption_space_mobile":{"unit":"px","size":"","sizes":[]},"_title":"","_margin":{"unit":"px","top":"","right":"","bottom":"","left":"","isLinked":true},"_margin_tablet":{"unit":"px","top":"","right":"","bottom":"","left":"","isLinked":true},"_margin_mobile":{"unit":"px","top":"","right":"","bottom":"","left":"","isLinked":true},"_padding":{"unit":"px","top":"","right":"","bottom":"","left":"","isLinked":true},"_padding_tablet":{"unit":"px","top":"","right":"","bottom":"","left":"","isLinked":true},"_padding_mobile":{"unit":"px","top":"","right":"","bottom":"","left":"","isLinked":true},"_element_width":"","_element_width_tablet":"","_element_width_mobile":"","_element_custom_width":{"unit":"%","size":"","sizes":[]},"_element_custom_width_tablet":{"unit":"px","size":"","sizes":[]},"_element_custom_width_mobile":{"unit":"px","size":"","sizes":[]},"_grid_column":"","_grid_column_tablet":"","_grid_column_mobile":"","_grid_column_custom":"","_grid_column_custom_tablet":"","_grid_column_custom_mobile":"","_grid_row":"","_grid_row_tablet":"","_grid_row_mobile":"","_grid_row_custom":"","_grid_row_custom_tablet":"","_grid_row_custom_mobile":"","_flex_align_self":"","_flex_align_self_tablet":"","_flex_align_self_mobile":"","_flex_order":"","_flex_order_tablet":"","_flex_order_mobile":"","_flex_order_custom":"","_flex_order_custom_tablet":"","_flex_order_custom_mobile":"","_flex_size":"","_flex_size_tablet":"","_flex_size_mobile":"","_flex_grow":1,"_flex_grow_tablet":"","_flex_grow_mobile":"","_flex_shrink":1,"_flex_shrink_tablet":"","_flex_shrink_mobile":"","_element_vertical_align":"","_element_vertical_align_tablet":"","_element_vertical_align_mobile":"","_position":"","_offset_orientation_h":"start","_offset_x":{"unit":"px","size":0,"sizes":[]},"_offset_x_tablet":{"unit":"px","size":"","sizes":[]},"_offset_x_mobile":{"unit":"px","size":"","sizes":[]},"_offset_x_end":{"unit":"px","size":0,"sizes":[]},"_offset_x_end_tablet":{"unit":"px","size":"","sizes":[]},"_offset_x_end_mobile":{"unit":"px","size":"","sizes":[]},"_offset_orientation_v":"start","_offset_y":{"unit":"px","size":0,"sizes":[]},"_offset_y_tablet":{"unit":"px","size":"","sizes":[]},"_offset_y_mobile":{"unit":"px","size":"","sizes":[]},"_offset_y_end":{"unit":"px","size":0,"sizes":[]},"_offset_y_end_tablet":{"unit":"px","size":"","sizes":[]},"_offset_y_end_mobile":{"unit":"px","size":"","sizes":[]},"_z_index":"","_z_index_tablet":"","_z_index_mobile":"","_element_id":"","_css_classes":"","e_display_conditions":"","_element_cache":"","motion_fx_motion_fx_scrolling":"","motion_fx_translateY_effect":"","motion_fx_translateY_direction":"","motion_fx_translateY_speed":{"unit":"px","size":4,"sizes":[]},"motion_fx_translateY_affectedRange":{"unit":"%","size":"","sizes":{"start":0,"end":100}},"motion_fx_translateX_effect":"","motion_fx_translateX_direction":"","motion_fx_translateX_speed":{"unit":"px","size":4,"sizes":[]},"motion_fx_translateX_affectedRange":{"unit":"%","size":"","sizes":{"start":0,"end":100}},"motion_fx_opacity_effect":"","motion_fx_opacity_direction":"out-in","motion_fx_opacity_level":{"unit":"px","size":10,"sizes":[]},"motion_fx_opacity_range":{"unit":"%","size":"","sizes":{"start":20,"end":80}},"motion_fx_blur_effect":"","motion_fx_blur_direction":"out-in","motion_fx_blur_level":{"unit":"px","size":7,"sizes":[]},"motion_fx_blur_range":{"unit":"%","size":"","sizes":{"start":20,"end":80}},"motion_fx_rotateZ_effect":"","motion_fx_rotateZ_direction":"","motion_fx_rotateZ_speed":{"unit":"px","size":1,"sizes":[]},"motion_fx_rotateZ_affectedRange":{"unit":"%","size":"","sizes":{"start":0,"end":100}},"motion_fx_scale_effect":"","motion_fx_scale_direction":"out-in","motion_fx_scale_speed":{"unit":"px","size":4,"sizes":[]},"motion_fx_scale_range":{"unit":"%","size":"","sizes":{"start":20,"end":80}},"motion_fx_transform_origin_x":"center","motion_fx_transform_origin_y":"center","motion_fx_devices":["desktop","tablet","mobile"],"motion_fx_range":"","motion_fx_motion_fx_mouse":"","motion_fx_mouseTrack_effect":"","motion_fx_mouseTrack_direction":"","motion_fx_mouseTrack_speed":{"unit":"px","size":1,"sizes":[]},"motion_fx_tilt_effect":"","motion_fx_tilt_direction":"","motion_fx_tilt_speed":{"unit":"px","size":4,"sizes":[]},"handle_motion_fx_asset_loading":"","sticky":"","sticky_on":["desktop","tablet","mobile"],"sticky_offset":0,"sticky_offset_tablet":"","sticky_offset_mobile":"","sticky_effects_offset":0,"sticky_effects_offset_tablet":"","sticky_effects_offset_mobile":"","sticky_anchor_link_offset":0,"sticky_anchor_link_offset_tablet":"","sticky_anchor_link_offset_mobile":"","sticky_parent":"","_animation":"","_animation_tablet":"","_animation_mobile":"","animation_duration":"","_animation_delay":"","_transform_rotate_popover":"","_transform_rotateZ_effect":{"unit":"px","size":"","sizes":[]},"_transform_rotateZ_effect_tablet":{"unit":"deg","size":"","sizes":[]},"_transform_rotateZ_effect_mobile":{"unit":"deg","size":"","sizes":[]},"_transform_rotate_3d":"","_transform_rotateX_effect":{"unit":"px","size":"","sizes":[]},"_transform_rotateX_effect_tablet":{"unit":"deg","size":"","sizes":[]},"_transform_rotateX_effect_mobile":{"unit":"deg","size":"","sizes":[]},"_transform_rotateY_effect":{"unit":"px","size":"","sizes":[]},"_transform_rotateY_effect_tablet":{"unit":"deg","size":"","sizes":[]},"_transform_rotateY_effect_mobile":{"unit":"deg","size":"","sizes":[]},"_transform_perspective_effect":{"unit":"px","size":"","sizes":[]},"_transform_perspective_effect_tablet":{"unit":"px","size":"","sizes":[]},"_transform_perspective_effect_mobile":{"unit":"px","size":"","sizes":[]},"_transform_translate_popover":"","_transform_translateX_effect":{"unit":"px","size":"","sizes":[]},"_transform_translateX_effect_tablet":{"unit":"px","size":"","sizes":[]},"_transform_translateX_effect_mobile":{"unit":"px","size":"","sizes":[]},"_transform_translateY_effect":{"unit":"px","size":"","sizes":[]},"_transform_translateY_effect_tablet":{"unit":"px","size":"","sizes":[]},"_transform_translateY_effect_mobile":{"unit":"px","size":"","sizes":[]},"_transform_scale_popover":"","_transform_keep_proportions":"yes","_transform_scale_effect":{"unit":"px","size":"","sizes":[]},"_transform_scale_effect_tablet":{"unit":"px","size":"","sizes":[]},"_transform_scale_effect_mobile":{"unit":"px","size":"","sizes":[]},"_transform_scaleX_effect":{"unit":"px","size":"","sizes":[]},"_transform_scaleX_effect_tablet":{"unit":"px","size":"","sizes":[]},"_transform_scaleX_effect_mobile":{"unit":"px","size":"","sizes":[]},"_transform_scaleY_effect":{"unit":"px","size":"","sizes":[]},"_transform_scaleY_effect_tablet":{"unit":"px","size":"","sizes":[]},"_transform_scaleY_effect_mobile":{"unit":"px","size":"","sizes":[]},"_transform_skew_popover":"","_transform_skewX_effect":{"unit":"px","size":"","sizes":[]},"_transform_skewX_effect_tablet":{"unit":"deg","size":"","sizes":[]},"_transform_skewX_effect_mobile":{"unit":"deg","size":"","sizes":[]},"_transform_skewY_effect":{"unit":"px","size":"","sizes":[]},"_transform_skewY_effect_tablet":{"unit":"deg","size":"","sizes":[]},"_transform_skewY_effect_mobile":{"unit":"deg","size":"","sizes":[]},"_transform_flipX_effect":"","_transform_flipY_effect":"","_transform_rotate_popover_hover":"","_transform_rotateZ_effect_hover":{"unit":"px","size":"","sizes":[]},"_transform_rotateZ_effect_hover_tablet":{"unit":"deg","size":"","sizes":[]},"_transform_rotateZ_effect_hover_mobile":{"unit":"deg","size":"","sizes":[]},"_transform_rotate_3d_hover":"","_transform_rotateX_effect_hover":{"unit":"px","size":"","sizes":[]},"_transform_rotateX_effect_hover_tablet":{"unit":"deg","size":"","sizes":[]},"_transform_rotateX_effect_hover_mobile":{"unit":"deg","size":"","sizes":[]},"_transform_rotateY_effect_hover":{"unit":"px","size":"","sizes":[]},"_transform_rotateY_effect_hover_tablet":{"unit":"deg","size":"","sizes":[]},"_transform_rotateY_effect_hover_mobile":{"unit":"deg","size":"","sizes":[]},"_transform_perspective_effect_hover":{"unit":"px","size":"","sizes":[]},"_transform_perspective_effect_hover_tablet":{"unit":"px","size":"","sizes":[]},"_transform_perspective_effect_hover_mobile":{"unit":"px","size":"","sizes":[]},"_transform_translate_popover_hover":"","_transform_translateX_effect_hover":{"unit":"px","size":"","sizes":[]},"_transform_translateX_effect_hover_tablet":{"unit":"px","size":"","sizes":[]},"_transform_translateX_effect_hover_mobile":{"unit":"px","size":"","sizes":[]},"_transform_translateY_effect_hover":{"unit":"px","size":"","sizes":[]},"_transform_translateY_effect_hover_tablet":{"unit":"px","size":"","sizes":[]},"_transform_translateY_effect_hover_mobile":{"unit":"px","size":"","sizes":[]},"_transform_scale_popover_hover":"","_transform_keep_proportions_hover":"yes","_transform_scale_effect_hover":{"unit":"px","size":"","sizes":[]},"_transform_scale_effect_hover_tablet":{"unit":"px","size":"","sizes":[]},"_transform_scale_effect_hover_mobile":{"unit":"px","size":"","sizes":[]},"_transform_scaleX_effect_hover":{"unit":"px","size":"","sizes":[]},"_transform_scaleX_effect_hover_tablet":{"unit":"px","size":"","sizes":[]},"_transform_scaleX_effect_hover_mobile":{"unit":"px","size":"","sizes":[]},"_transform_scaleY_effect_hover":{"unit":"px","size":"","sizes":[]},"_transform_scaleY_effect_hover_tablet":{"unit":"px","size":"","sizes":[]},"_transform_scaleY_effect_hover_mobile":{"unit":"px","size":"","sizes":[]},"_transform_skew_popover_hover":"","_transform_skewX_effect_hover":{"unit":"px","size":"","sizes":[]},"_transform_skewX_effect_hover_tablet":{"unit":"deg","size":"","sizes":[]},"_transform_skewX_effect_hover_mobile":{"unit":"deg","size":"","sizes":[]},"_transform_skewY_effect_hover":{"unit":"px","size":"","sizes":[]},"_transform_skewY_effect_hover_tablet":{"unit":"deg","size":"","sizes":[]},"_transform_skewY_effect_hover_mobile":{"unit":"deg","size":"","sizes":[]},"_transform_flipX_effect_hover":"","_transform_flipY_effect_hover":"","_transform_transition_hover":{"unit":"px","size":"","sizes":[]},"motion_fx_transform_x_anchor_point":"","motion_fx_transform_x_anchor_point_tablet":"","motion_fx_transform_x_anchor_point_mobile":"","motion_fx_transform_y_anchor_point":"","motion_fx_transform_y_anchor_point_tablet":"","motion_fx_transform_y_anchor_point_mobile":"","_background_background":"","_background_color":"","_background_color_stop":{"unit":"%","size":0,"sizes":[]},"_background_color_stop_tablet":{"unit":"%","size":"","sizes":[]},"_background_color_stop_mobile":{"unit":"%","size":"","sizes":[]},"_background_color_b":"#f2295b","_background_color_b_stop":{"unit":"%","size":100,"sizes":[]},"_background_color_b_stop_tablet":{"unit":"%","size":"","sizes":[]},"_background_color_b_stop_mobile":{"unit":"%","size":"","sizes":[]},"_background_gradient_type":"linear","_background_gradient_angle":{"unit":"deg","size":180,"sizes":[]},"_background_gradient_angle_tablet":{"unit":"deg","size":"","sizes":[]},"_background_gradient_angle_mobile":{"unit":"deg","size":"","sizes":[]},"_background_gradient_position":"center center","_background_gradient_position_tablet":"center center","_background_gradient_position_mobile":"center center","_background_image":{"url":"","id":"","size":""},"_background_image_tablet":{"url":"","id":"","size":""},"_background_image_mobile":{"url":"","id":"","size":""},"_background_position":"","_background_position_tablet":"","_background_position_mobile":"","_background_xpos":{"unit":"px","size":0,"sizes":[]},"_background_xpos_tablet":{"unit":"px","size":0,"sizes":[]},"_background_xpos_mobile":{"unit":"px","size":0,"sizes":[]},"_background_ypos":{"unit":"px","size":0,"sizes":[]},"_background_ypos_tablet":{"unit":"px","size":0,"sizes":[]},"_background_ypos_mobile":{"unit":"px","size":0,"sizes":[]},"_background_attachment":"","_background_repeat":"","_background_repeat_tablet":"","_background_repeat_mobile":"","_background_size":"","_background_size_tablet":"","_background_size_mobile":"","_background_bg_width":{"unit":"%","size":100,"sizes":[]},"_background_bg_width_tablet":{"unit":"px","size":"","sizes":[]},"_background_bg_width_mobile":{"unit":"px","size":"","sizes":[]},"_background_video_link":"","_background_video_start":"","_background_video_end":"","_background_play_once":"","_background_play_on_mobile":"","_background_privacy_mode":"","_background_video_fallback":{"url":"","id":"","size":""},"_background_slideshow_gallery":[],"_background_slideshow_loop":"yes","_background_slideshow_slide_duration":5000,"_background_slideshow_slide_transition":"fade","_background_slideshow_transition_duration":500,"_background_slideshow_background_size":"","_background_slideshow_background_size_tablet":"","_background_slideshow_background_size_mobile":"","_background_slideshow_background_position":"","_background_slideshow_background_position_tablet":"","_background_slideshow_background_position_mobile":"","_background_slideshow_lazyload":"","_background_slideshow_ken_burns":"","_background_slideshow_ken_burns_zoom_direction":"in","_background_hover_background":"","_background_hover_color":"","_background_hover_color_stop":{"unit":"%","size":0,"sizes":[]},"_background_hover_color_stop_tablet":{"unit":"%","size":"","sizes":[]},"_background_hover_color_stop_mobile":{"unit":"%","size":"","sizes":[]},"_background_hover_color_b":"#f2295b","_background_hover_color_b_stop":{"unit":"%","size":100,"sizes":[]},"_background_hover_color_b_stop_tablet":{"unit":"%","size":"","sizes":[]},"_background_hover_color_b_stop_mobile":{"unit":"%","size":"","sizes":[]},"_background_hover_gradient_type":"linear","_background_hover_gradient_angle":{"unit":"deg","size":180,"sizes":[]},"_background_hover_gradient_angle_tablet":{"unit":"deg","size":"","sizes":[]},"_background_hover_gradient_angle_mobile":{"unit":"deg","size":"","sizes":[]},"_background_hover_gradient_position":"center center","_background_hover_gradient_position_tablet":"center center","_background_hover_gradient_position_mobile":"center center","_background_hover_image":{"url":"","id":"","size":""},"_background_hover_image_tablet":{"url":"","id":"","size":""},"_background_hover_image_mobile":{"url":"","id":"","size":""},"_background_hover_position":"","_background_hover_position_tablet":"","_background_hover_position_mobile":"","_background_hover_xpos":{"unit":"px","size":0,"sizes":[]},"_background_hover_xpos_tablet":{"unit":"px","size":0,"sizes":[]},"_background_hover_xpos_mobile":{"unit":"px","size":0,"sizes":[]},"_background_hover_ypos":{"unit":"px","size":0,"sizes":[]},"_background_hover_ypos_tablet":{"unit":"px","size":0,"sizes":[]},"_background_hover_ypos_mobile":{"unit":"px","size":0,"sizes":[]},"_background_hover_attachment":"","_background_hover_repeat":"","_background_hover_repeat_tablet":"","_background_hover_repeat_mobile":"","_background_hover_size":"","_background_hover_size_tablet":"","_background_hover_size_mobile":"","_background_hover_bg_width":{"unit":"%","size":100,"sizes":[]},"_background_hover_bg_width_tablet":{"unit":"px","size":"","sizes":[]},"_background_hover_bg_width_mobile":{"unit":"px","size":"","sizes":[]},"_background_hover_video_link":"","_background_hover_video_start":"","_background_hover_video_end":"","_background_hover_play_once":"","_background_hover_play_on_mobile":"","_background_hover_privacy_mode":"","_background_hover_video_fallback":{"url":"","id":"","size":""},"_background_hover_slideshow_gallery":[],"_background_hover_slideshow_loop":"yes","_background_hover_slideshow_slide_duration":5000,"_background_hover_slideshow_slide_transition":"fade","_background_hover_slideshow_transition_duration":500,"_background_hover_slideshow_background_size":"","_background_hover_slideshow_background_size_tablet":"","_background_hover_slideshow_background_size_mobile":"","_background_hover_slideshow_background_position":"","_background_hover_slideshow_background_position_tablet":"","_background_hover_slideshow_background_position_mobile":"","_background_hover_slideshow_lazyload":"","_background_hover_slideshow_ken_burns":"","_background_hover_slideshow_ken_burns_zoom_direction":"in","_background_hover_transition":{"unit":"px","size":"","sizes":[]},"_border_border":"","_border_width":{"unit":"px","top":"","right":"","bottom":"","left":"","isLinked":true},"_border_width_tablet":{"unit":"px","top":"","right":"","bottom":"","left":"","isLinked":true},"_border_width_mobile":{"unit":"px","top":"","right":"","bottom":"","left":"","isLinked":true},"_border_color":"","_border_radius":{"unit":"px","top":"","right":"","bottom":"","left":"","isLinked":true},"_border_radius_tablet":{"unit":"px","top":"","right":"","bottom":"","left":"","isLinked":true},"_border_radius_mobile":{"unit":"px","top":"","right":"","bottom":"","left":"","isLinked":true},"_box_shadow_box_shadow_type":"","_box_shadow_box_shadow":{"horizontal":0,"vertical":0,"blur":10,"spread":0,"color":"rgba(0,0,0,0.5)"},"_box_shadow_box_shadow_position":" ","_border_hover_border":"","_border_hover_width":{"unit":"px","top":"","right":"","bottom":"","left":"","isLinked":true},"_border_hover_width_tablet":{"unit":"px","top":"","right":"","bottom":"","left":"","isLinked":true},"_border_hover_width_mobile":{"unit":"px","top":"","right":"","bottom":"","left":"","isLinked":true},"_border_hover_color":"","_border_radius_hover":{"unit":"px","top":"","right":"","bottom":"","left":"","isLinked":true},"_border_radius_hover_tablet":{"unit":"px","top":"","right":"","bottom":"","left":"","isLinked":true},"_border_radius_hover_mobile":{"unit":"px","top":"","right":"","bottom":"","left":"","isLinked":true},"_box_shadow_hover_box_shadow_type":"","_box_shadow_hover_box_shadow":{"horizontal":0,"vertical":0,"blur":10,"spread":0,"color":"rgba(0,0,0,0.5)"},"_box_shadow_hover_box_shadow_position":" ","_border_hover_transition":{"unit":"px","size":"","sizes":[]},"_mask_switch":"","_mask_shape":"circle","_mask_image":{"url":"","id":"","size":""},"_mask_image_tablet":{"url":"","id":"","size":""},"_mask_image_mobile":{"url":"","id":"","size":""},"_mask_size":"contain","_mask_size_tablet":"","_mask_size_mobile":"","_mask_size_scale":{"unit":"%","size":100,"sizes":[]},"_mask_size_scale_tablet":{"unit":"px","size":"","sizes":[]},"_mask_size_scale_mobile":{"unit":"px","size":"","sizes":[]},"_mask_position":"center center","_mask_position_tablet":"","_mask_position_mobile":"","_mask_position_x":{"unit":"%","size":0,"sizes":[]},"_mask_position_x_tablet":{"unit":"px","size":"","sizes":[]},"_mask_position_x_mobile":{"unit":"px","size":"","sizes":[]},"_mask_position_y":{"unit":"%","size":0,"sizes":[]},"_mask_position_y_tablet":{"unit":"px","size":"","sizes":[]},"_mask_position_y_mobile":{"unit":"px","size":"","sizes":[]},"_mask_repeat":"no-repeat","_mask_repeat_tablet":"","_mask_repeat_mobile":"","hide_desktop":"","hide_tablet":"","hide_mobile":"","_attributes":"","custom_css":""},"defaultEditSettings":{"defaultEditRoute":"content"},"elements":[],"widgetType":"image","editSettings":{"defaultEditRoute":"content","panel":{"activeTab":"content","activeSection":"section_image"}}}]}](https://packifyme.com/wp-content/uploads/2025/11/7-Step-by-Step-Guide-to-Designing-Custom-Tincture-Boxes-1024x320.webp "Step-by-Step Guide to Designing Custom Tincture Boxes 1")
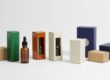
Step-by-Step Guide to Designing Custom Tincture Boxes
Custom tincture box design isn’t just packaging design. It’s trust creation, quality words, and defining your brand. Incredible packaging can change the humble tincture bottle into something that feels luxurious and high-end.
In this articles, we walk you through every step of custom tincture design boxes — from discovering your brand to choosing the ideal material and finishes. Let’s begin!
Understanding the Purpose of Custom Tincture Boxes
Why Custom Tincture Boxes Are Important
Tinctures are mostly used for wellness, herbal, or CBD items. Products are sensitive and need to be kept away from light, oxygen, and water. That is where strong and well-designed boxes fit into the picture.
A bespoke tincture box not only keeps the bottle safe but also educates customers about what your business stands for. It can convey quality, care, and trust — all at the same time.
Branding Through Custom Boxes
The very first thing that individuals notice when they place their eyes on your tincture box is already a thought regarding your brand. A spotless box that appears professional conveys the image of believability to your brand. A distinct, contemporary box conveys to it a modern-day, matured impression.
Custom boxes allow you to place your logo, brand color, and motivational text. This makes each box a mini advertisement.
Step 1: Know Your Brand and Customer
Define Your Brand Personality
Get to know your brand’s personality before you sit down and work on designing your tincture boxes. Ask yourself:
What does my brand stand for?
What type of feelings do I want to create?
Do I have a natural, luxury, or modern appearance?
If you sell herbal tinctures, then use earth colors and kraft boxes. If you sell tinctures for a high-end health business, then use elegant font types and shiny coatings.
Know Your Customers
Think about who will be buying your tinctures. Will they be well-being-oriented adults, skin-care enthusiasts, or CBD fans? Knowing your customers allows you to pick the right design, color, and box type.
Low-key, healthful appearances are the right choice for products for well-being, for example. Bright, highly colored packaging will probably have teen appeal.
Step 2: Choose the Right Box Style
Common Tincture Box Styles
There are a few common box styles that are employed to package tinctures. Each is used for a particular purpose.
Tuck-End Boxes:
These are the most popular of the inward flapped boxes. These are easy to make and are appropriate for regular bottles of tinctures.
Two-Piece Rigid Boxes:
These look upscale and provide added protection. These are good for gift-giving or specialty tinctures.
Sleeve Boxes:
These have a sliding inner tray within a sleeve. These are clean and fashionable.
Window Boxes:
They are a cut-out portion of transparent material, allowing customers to see the product without opening the box.
Display Boxes:
They are best for shelf display in retail stores since they hold more than one bottle of tincture and draw people to stores.
Select a Size That Fits Just Right
Your box should keep your tincture bottle snug. Loose boxes cause movement and cracking. Get your bottle diameter, width, and height before you determine the size.
A tighter one will be neater and better protected from shipping damage.
Step 3: Select the Best Material
Solid and Eco-Friendly Options
The material used determines the strength and appearance of the box. Some of them are:
Cardboard: It is cheap, light, and printable.
Most suitable for most tincture packaging boxes.
Kraft Paper: Earthy natural feel. Organic brand.
Rigid Paperboard: High-gauge and high-end. High-end tincture brands.
Corrugated Board: Most practical for shipping boxes or bigger pack sizes.
Why Material Matters
Great material makes your tincture packaging feel like treasure. It also prevents water or sun damage. And, eco-friendly materials attract earth-aware customers today.
Step 4: Design the Box Layout
Create a Box Template
Once you’ve got your box size, you can sketch a dieline — a two-dimensional map of where cuts, folds, and glue points will be. Dielines help designers position graphics and text.
Use Brand Elements
Add your logo, brand colors, and patterns that appeal to your product line. Ensure they all look consistent. Consistency in your brand creates recognition and trust.
Keep the Design Clean
Basic layouts will be neater and more professional. Do not overload on the photos or dense text. Highlight the key facts such as:
- Product name
- Main ingredients
- How to use it
- Brand logo
- Warning (if required)
Step 5: Select Fonts and Colors
The Right Font
Fonts may make a difference in how others perceive your brand.
Serif fonts (e.g., Times New Roman) sound traditional and solid.
Sans-serif fonts (e.g., Arial) are modern and professional-looking.
Script fonts convey luxury or artwork.
Make sure your font is readable from a distance.
With Color Psychology
Color creates emotion. Use the colors most appropriate to your brand’s emotional character.
- Green: Nature, health, calmness
- Blue: Calmness, trust, stability
- Black: Power and luxury
- White: Simple and clean
- Brown/Kraft: Earthy and green
Don’t use too much color. Keep it simple so your box appears classy and neat.
Step 6: Add Functional Details
Labeling and Legal Compliance
Tinctures are wellness or health products, so there must be labeling. Always include:
- Product name
- Ingredients
- Instructions for use
- Warnings or disclaimers
- Batch number and expiry date
This puts your product in a regulatory state with packaging legislation that is safe for your customers.
Insert a Barcode or QR Code
A barcode is readable at the shop. A QR code can take customers to your website, product details, or how-to use. It’s a smart way to link customers and trust.
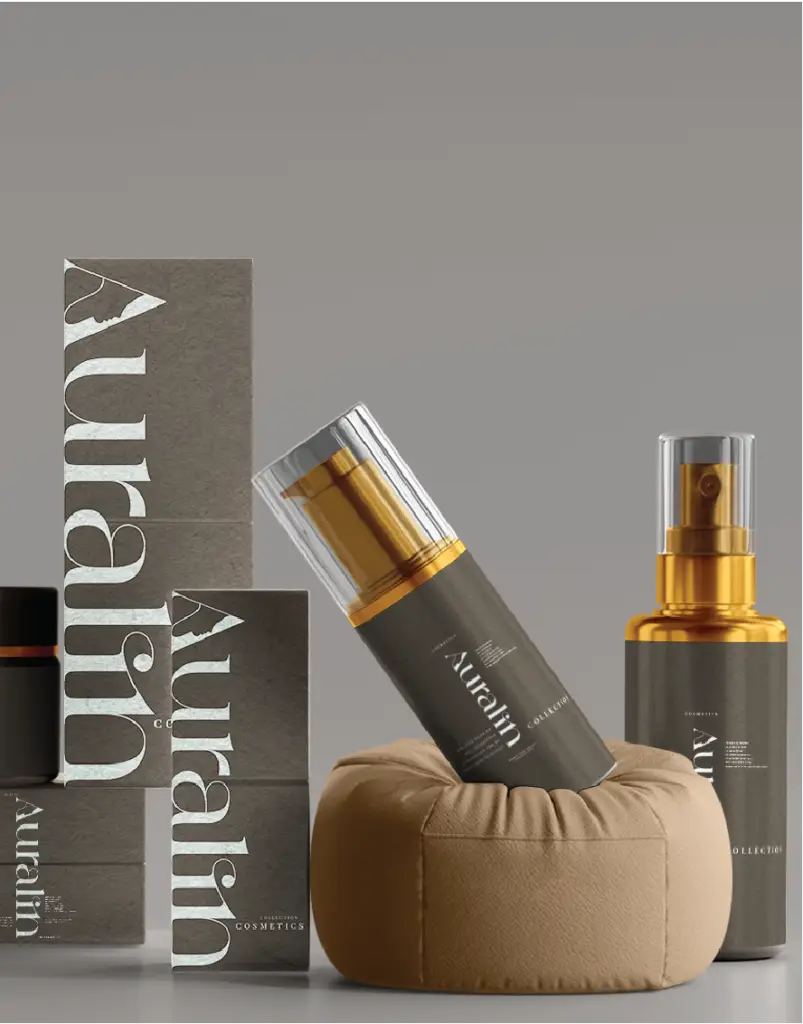
Step 7: Select Finishing Touches
Apply Shine and Texture
Finishing provides your box with a high-end look. Some of our favorites include:
- Gloss Finish: Shiny, bright look.
- Matte Finish: Soft, gentle, luxurious feel.
- Spot UV: Accentuates logos or text with shine.
- Foil Stamping: Imprints metallic accents in gold or silver.
- Embossing/Debossing: Drips or presses the design to achieve a 3D effect.
These finishes will make your tincture custom packaging memorable and premium.
Step 8: Insert Inserts or Bottle Holders
Why Inserts are Important
Inserts support the bottle of tincture in the box. They hold things in position and avoid broken glass.
You may use:
- Paper inserts for lighter bottles.
- Foam inserts for upscale or delicate tinctures.
- Cardboard holders for environmentally friendly solutions.
- Well-fitting inserts also provide the users with a better unboxing experience.
Step 9: Check and Test the Design
Print a Sample
Print a prototype or sample box beforehand, before you go into mass production. That way, you can ensure the color, size, and design in real life are as desired.
Make sure the letters are clear and that everything folds correctly. Make sure how your bottle will fit inside as well.
Test Durability
Test your box by shipping, shaking, or dropping it. Your box should protect your tincture from handling. Sturdy boxes reduce product return and customer complaints.
Step 10: Order in Bulk and Save
After you are content with your design, order your boxes in bulk. Bulk orders are generally cheaper per unit.
Make sure that you work with a good packaging supplier who has good printing and faster delivery.
Step 11: Select Environmentally Friendly Packaging
Go Green
Even more individuals today are concerned about the environment. Biodegradable or recyclable packaging gives your company authenticity and creates green shoppers.
You can add a small label like “100% Recyclable” or “Eco-Friendly Packaging” on your box to symbolize your values.
Less Waste
Select packaging that closely fits the bottle — no excess material or space wasted. Simple designs save resources and are style-ahead.
Step 12: Create a Reminiscence Unboxing Experience
Insert a Personal Touch
Unboxing can be made a memorable experience that sets your brand apart. Insert small personal touches such as:
- Thank you cards
- QR codes with product details
- Small samples or discount coupons
- These are indications that you care about your customers.
Create Brand Loyalty
If customers like opening your package, they will shop from you again and refer your brand to their friends.
Conclusion
Designing tincture boxes is an art of blending brand, beauty, and functionality. It is doing it right that will sell your packaging, protect your products, and win customer loyalty. By doing it step by step in this process — from material selection to final touches — you can have tincture boxes that most aptly express the personality and character of your brand. Remember: great packaging is not simply a box for your product. It communicates volumes about your brand, makes first impressions, and builds long-term trust.
Frequently Asked Questions (FAQs) related to Custom Tincture Design
Q 1. Why do we need custom tincture boxes?
They protect your bottles of tincture and give your business a professional touch. Quality boxes also attract buyers.
Q 2. How large a tincture bottle box?
The box must be slipped over the bottle with no room to spare around the bottle. Standard sizes are for 15ml, 30ml, or 60ml tincture bottles.
Q 3. Can I make green tincture boxes?
Yes! Utilize kraft paper, recycled cardboard, or soy ink for an environmentally friendly packaging solution.
Q 4. How do I make packaging for a tincture premium-looking?
Utilize finishes like foil stamping, embossing, or matte lamination. Add inserts and high-quality prints to give it a luxurious look.
Q 5. What do I print on tincture boxes?
Your logo, product name, directions of use, and required warnings or ingredient information.
Q 6. May I order tincture boxes in different sizes of bottles?
Yes, you may order custom sizes for every size of a bottle to provide you with an exact fit.
Q 7. How am I going to get the custom tincture boxes printed?
You may search for many online packaging companies that can be personalized. Choose one with design support and eco-friendly options.